How to Install and Remove SFP modules
Introduction
Use a transceiver module for connection to a remote device. The SFP (also known as mini-GBIC) and SFP+ transceiver modules are hot swappable. This means that you can install and remove a module while your device is operating. The SFP and SFP+ modules provide duplex single-mode or multi-mode connections. SFP Transceiver Modules The SFP module uses 3.3V power input and either duplex LC-type connectors or RJ-45 connector (e.g. Cisco SFP To RJ45 converter GLC-T). SFP+ Transceiver Modules The SFP+ module uses single 3.3V power input and duplex LC connector interface.
Note: SFP and SFP+ are static sensitive. To prevent damage from electrostatic discharge (ESD), it is recommended you attach an ESD preventive wrist strap to your wrist and to a bare metal surface when you install or remove a SFP or SFP+ module. SFP and SFP+ modules are dust sensitive. When not in use, always keep the dust plug on. Avoid getting dust and other contaminant into the optical bores, as the optics do not work correctly when obstructed with dust.
Note: Optical SFP and Fiber SFP+ modules are equipped with a Class 1 laser, which emits invisible radiation. To avoid possible eye injury, do not look into an operating fiber-optic module's connectors. Laser radiation is present when the device or system is powered up. Only trained and qualified personnel should be allowed to install or replace these modules.
Installing and Removing an SFP/SFP+ Module
This section describes how you install and remove a SFP or SFP+ module.
Note: Disconnect all fiber-optic cables from an SFP/SFP+ module before installing or removing it. Do NOT remove and install an SFP/SFP+ module more often than is absolutely necessary. Doing so may shorten the useful life of the SFP/SFP+ module.
Installing an SFP Module
Follow the steps below to install an SFP/SFP+ module.
- Attach an ESD preventive wrist strap to your wrist and to a bare metal surface.
- Remove the SFP/SFP+ module from its protective packaging.
- Locate the transmit (Tx) and the receive (Rx) markings on the SFP/SFP+ module.
- Align the SFP/SFP+ module in front of the slot opening on a device.
- Insert the SFP/SFP+ module into the slot until the SFP/SFP+ module snaps into place
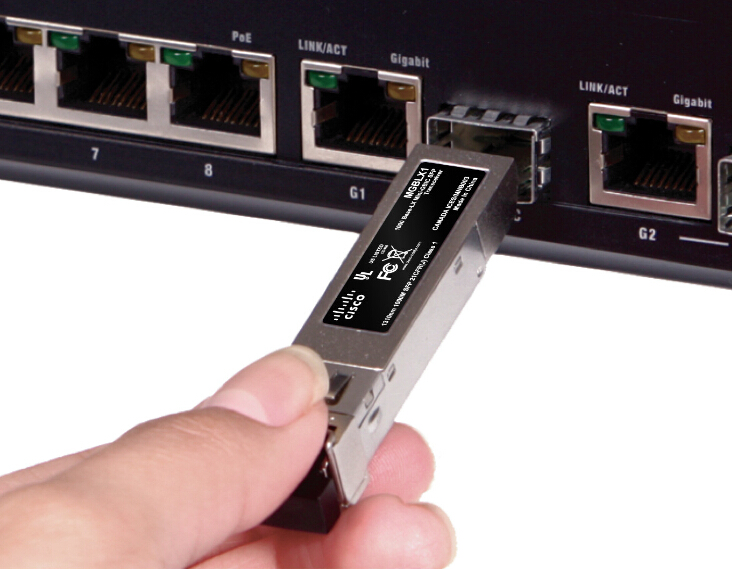
Note: SFP/SFP+ module installation orientation varies depending on your device. Your SFP/SFP+ module comes with a mechanism that prevents incorrect insertion. Do NOT force or twist the SFP/SFP+ module into a slot.
Connecting a Fiber-optic Cable
Follow the steps described to connect a fiber-optic cable to the SFP/SFP+ module.
- Remove the dust plugs from the SFP/SFP+ module and the cables.
- Identify the signal transmission direction of the fiber-optic cable and the SFP/SFP+ module. Insert one end of the fiber-optic cable into the SFP/SFP+ module.
- Insert the other end of the fiber- optic cable into a remote device.
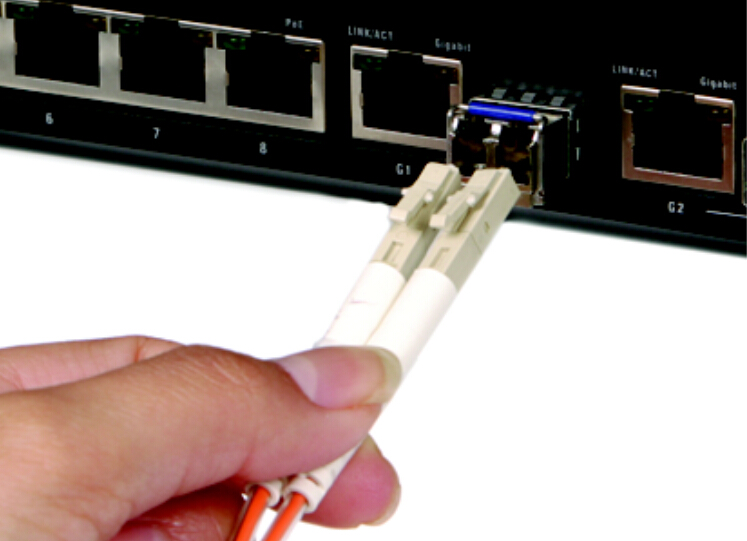
Refer to the user’s guide that comes with your device for SFP/SFP+ module slot status.
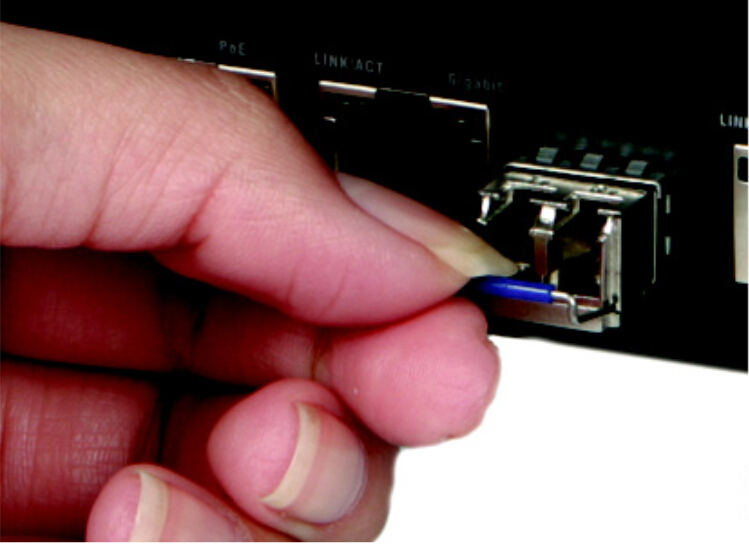
Removing an SFP/SFP+ Module
Follow the steps below to remove an SFP/SFP+ module.
- Attach an ESD preventive wrist strap to your wrist and to a bare metal surface on the chassis.
- Disconnect all fiber-optic cables from the SFP/SFP+ module.
- Insert the dust plug into the ports on the SFP/SFP+ module.
- Pull out the latch and down to unlock the SFP/SFP+ module.
- Using your thumb and index finger, grasp the tabs on both sides of the module and carefully slide it out of the slot.
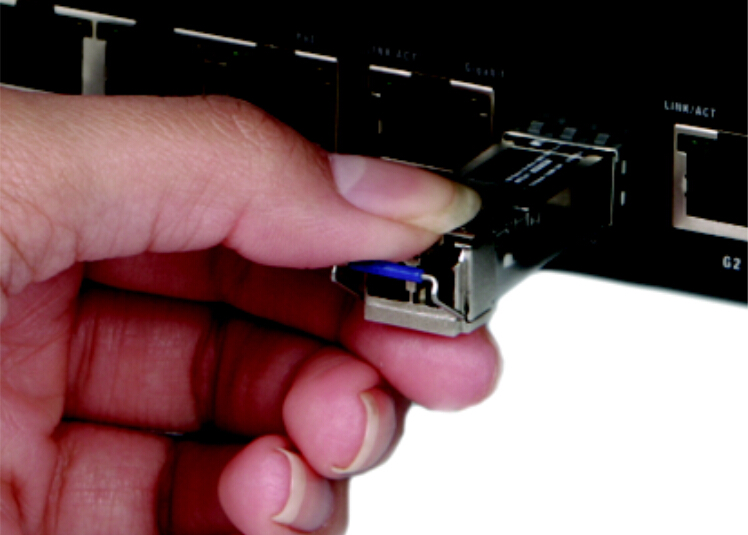
Note: Do NOT force or twist the module out of a slot.